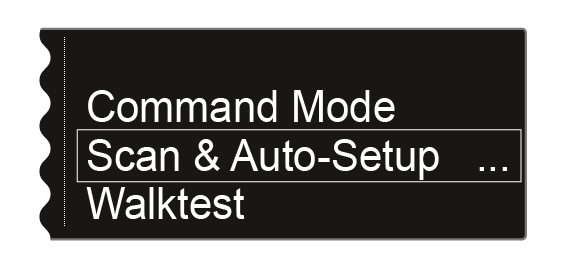
Scan & Auto-Setup menu item
The EM 6000 lets you scan the frequency spectrum and display all of the free frequencies in the selected frequency range. The automatic frequency setup can be used to distribute the free frequencies to all of the EM 6000 devices available in the network automatically.
You can select the frequency range to be scanned from the predefined frequencies B1 to B6 or from the user-defined frequency banks U1 to U6 or set them manually.
The Auto Setup function also helps you set up an equidistant frequency grid using the E frequency bank intended for this purpose. For more information about the equidistant frequency grid, see Equidistant frequency grid.
Alternatively, you can also use the Sennheiser Wireless Systems Manager (WSM) software or the Sennheiser Control Cockpit (SCC) software.
-
Turn the jog dial until the Scan & Auto-Setup menu item appears in the selection frame:
-
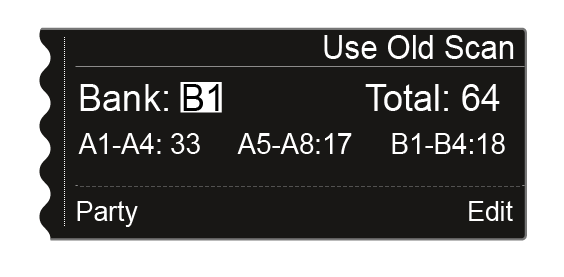
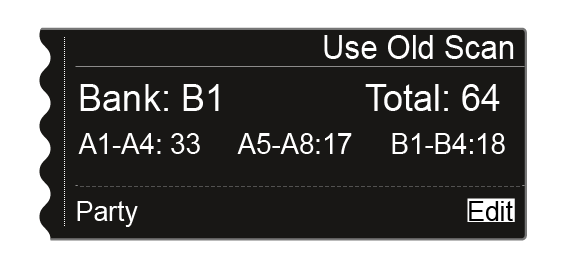
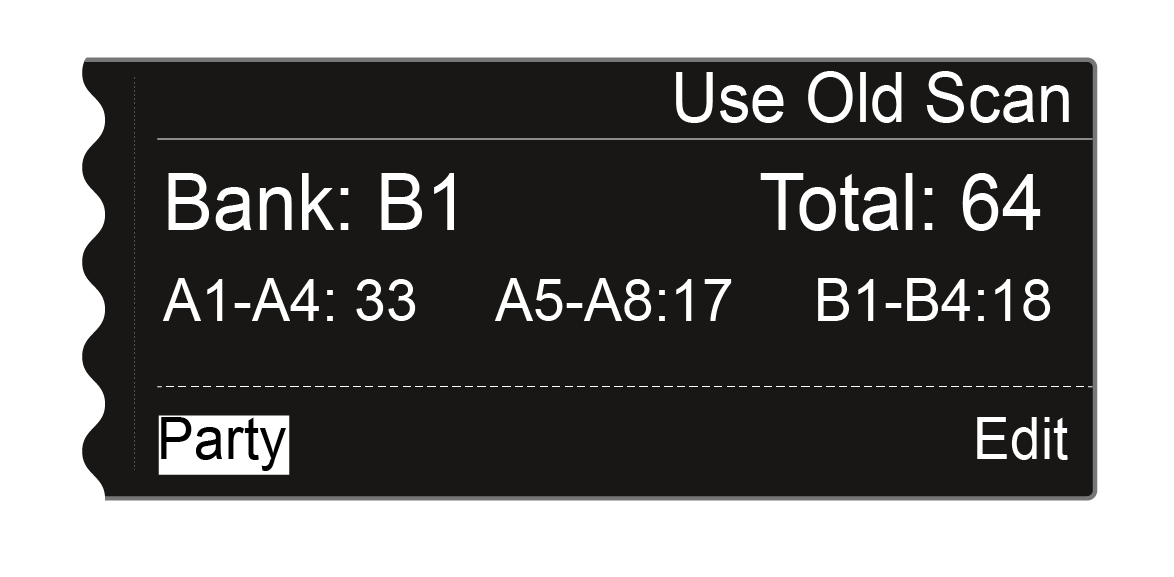
In the Scan & Auto-Setup menu item, choose Use Old Scan if you have already performed a scan and you want to add only a small number of new devices to the existing production environment.

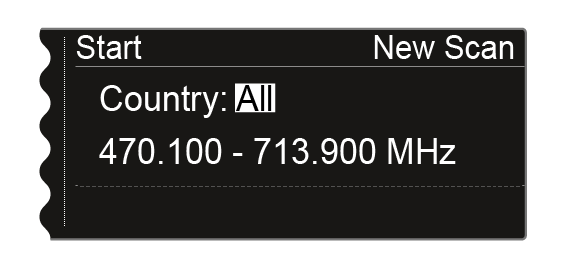
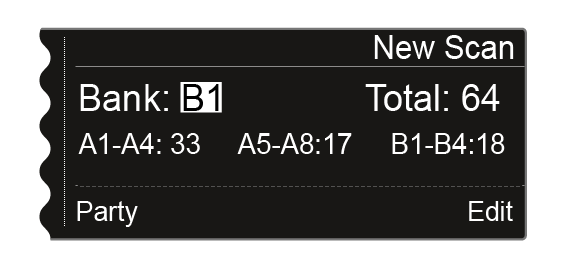
- After you choose New Scan, the following view is displayed.
- After you choose Use Old Scan, the result of the last scan is displayed.
- After you choose New Scan, the following view is displayed.
-
Or: Press the jog dial to set the frequency range to be scanned manually.
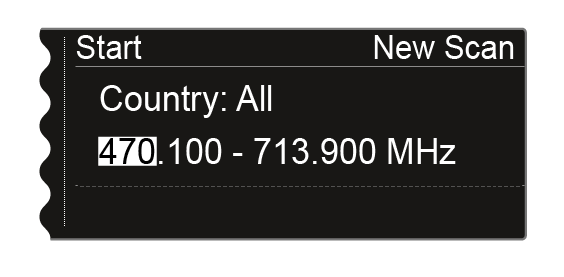
You can adjust the value by turning the jog dial. Press the jog dial to move back and forth between the individual points of the frequencies. -
After you set the frequency range to be scanned, press the jog dial until the Start option in the top left of the selection is displayed with a white background.

-
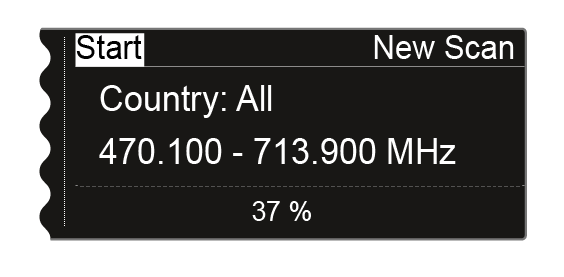
Press the jog dial to start the frequency scan.
- The scan is performed. The progress is displayed in % on the display.
- Once the scan is performed, the result is displayed. All of the free frequencies in the selected range are displayed.
- The scan is performed. The progress is displayed in % on the display.
-
Turn the jog dial to the right.
The Edit function is displayed in the bottom right in a white background.
-
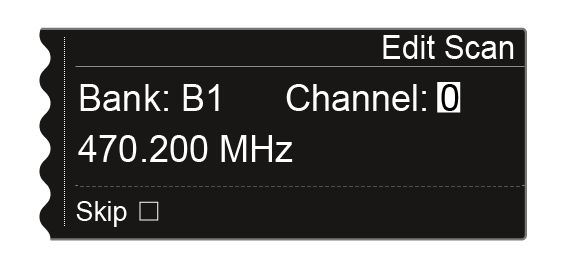
Press the jog dial to open the Edit function.
The following view is displayed:
-
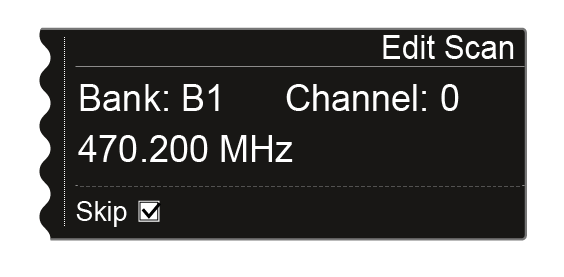
Press the jog dial
The checkbox for the Skip option is highlighted in white.

-
Turn the jog dial to activate the Skip option for the selected channel.
-
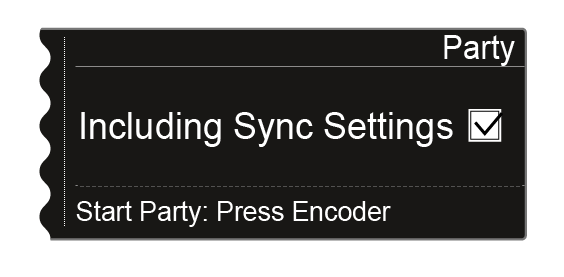
Press the jog dial to display the next step.
-
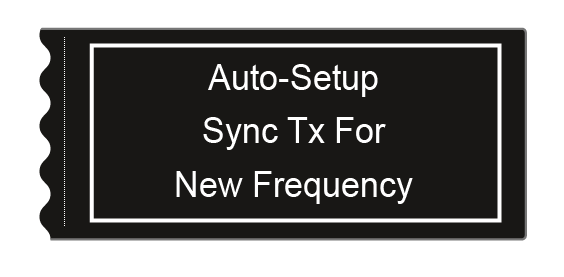
Press the jog dial to start the automatic frequency setup.
The setup is performed for all receivers that are available in the network. Note that the Auto-Setup option in the System menu item must be activated for all of the receivers. Once setup is complete, the following message is shown on all displays of all receiving channels.
However, if you press the ESC button for the channel in which you started the auto-setup function, the sync is canceled for all of the channels in the network.
The EM 6000 on which you perform the Auto-Setup function is defined as the master device in the network. The other devices adopt the follower function.