
Setting up the receiver
This sections describes how to set up the receiver.
You can also install the receiver in a fixed location, e.g. in a 19" rack. You can find more information about installing the receiver in a fixed location under: Installing receivers in a rack.
Affixing the device feet
Only affix the device feet if you are setting the receiver up in the stand-alone position instead of installing it in a 19" rack. The device feet will get in the way if the receiver is installed in a rack.
| NOTICE | |
|---|---|
Attaching the mounting angles
The mounting angles are designed to help protect the operating elements from damage or deformation, e.g.
if the receiver is dropped. We therefore recommend always attaching the mounting angles,
even if you do not want to mount the receiver into a rack.
-
Secure the mounting angles to the sides of the receiver using the previously removed recessed head screws.
Make sure that the angled ends of the mounting angles point forward.
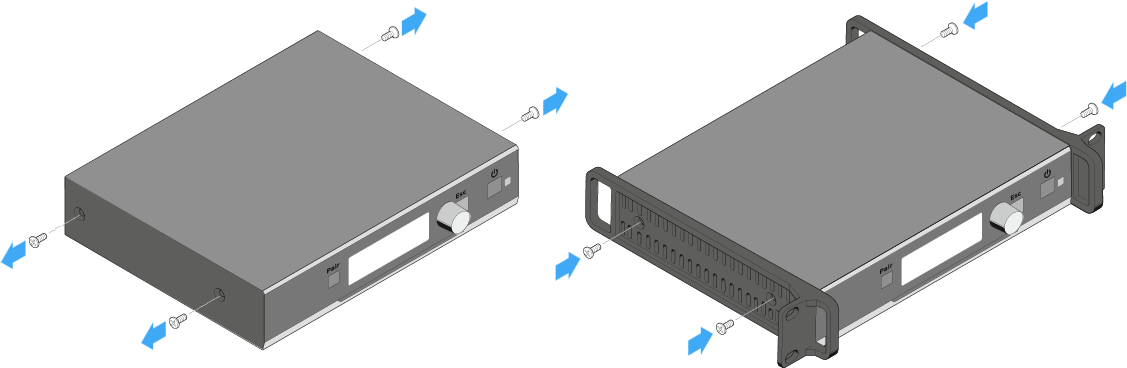
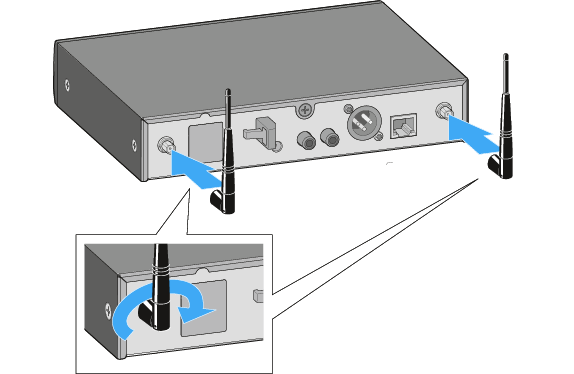
Connecting the rod antenna to the receiver
-
Align the rod antenna vertically.
Connecting the AWM 2 / AWM 4 remote antenna to the receiver
Instead of the supplied rod antenna, you can also connect a remote antenna to the receiver. For more information, see AWM 2 / AWM 4 remote antennas.