Performing multi-channel frequency setup
As an alternative to the following procedure, multi-channel frequency setup can also be performed using the Sennheiser Wireless
Systems Manager (WSM) software. For more information about controlling devices via the Sennheiser Wireless Systems Manager
(WSM) software, refer to the instruction manual for the software. You can download the software here: sennheiser.com/wsm.
To perform the automatic frequency setup for multiple radio links simultaneously:
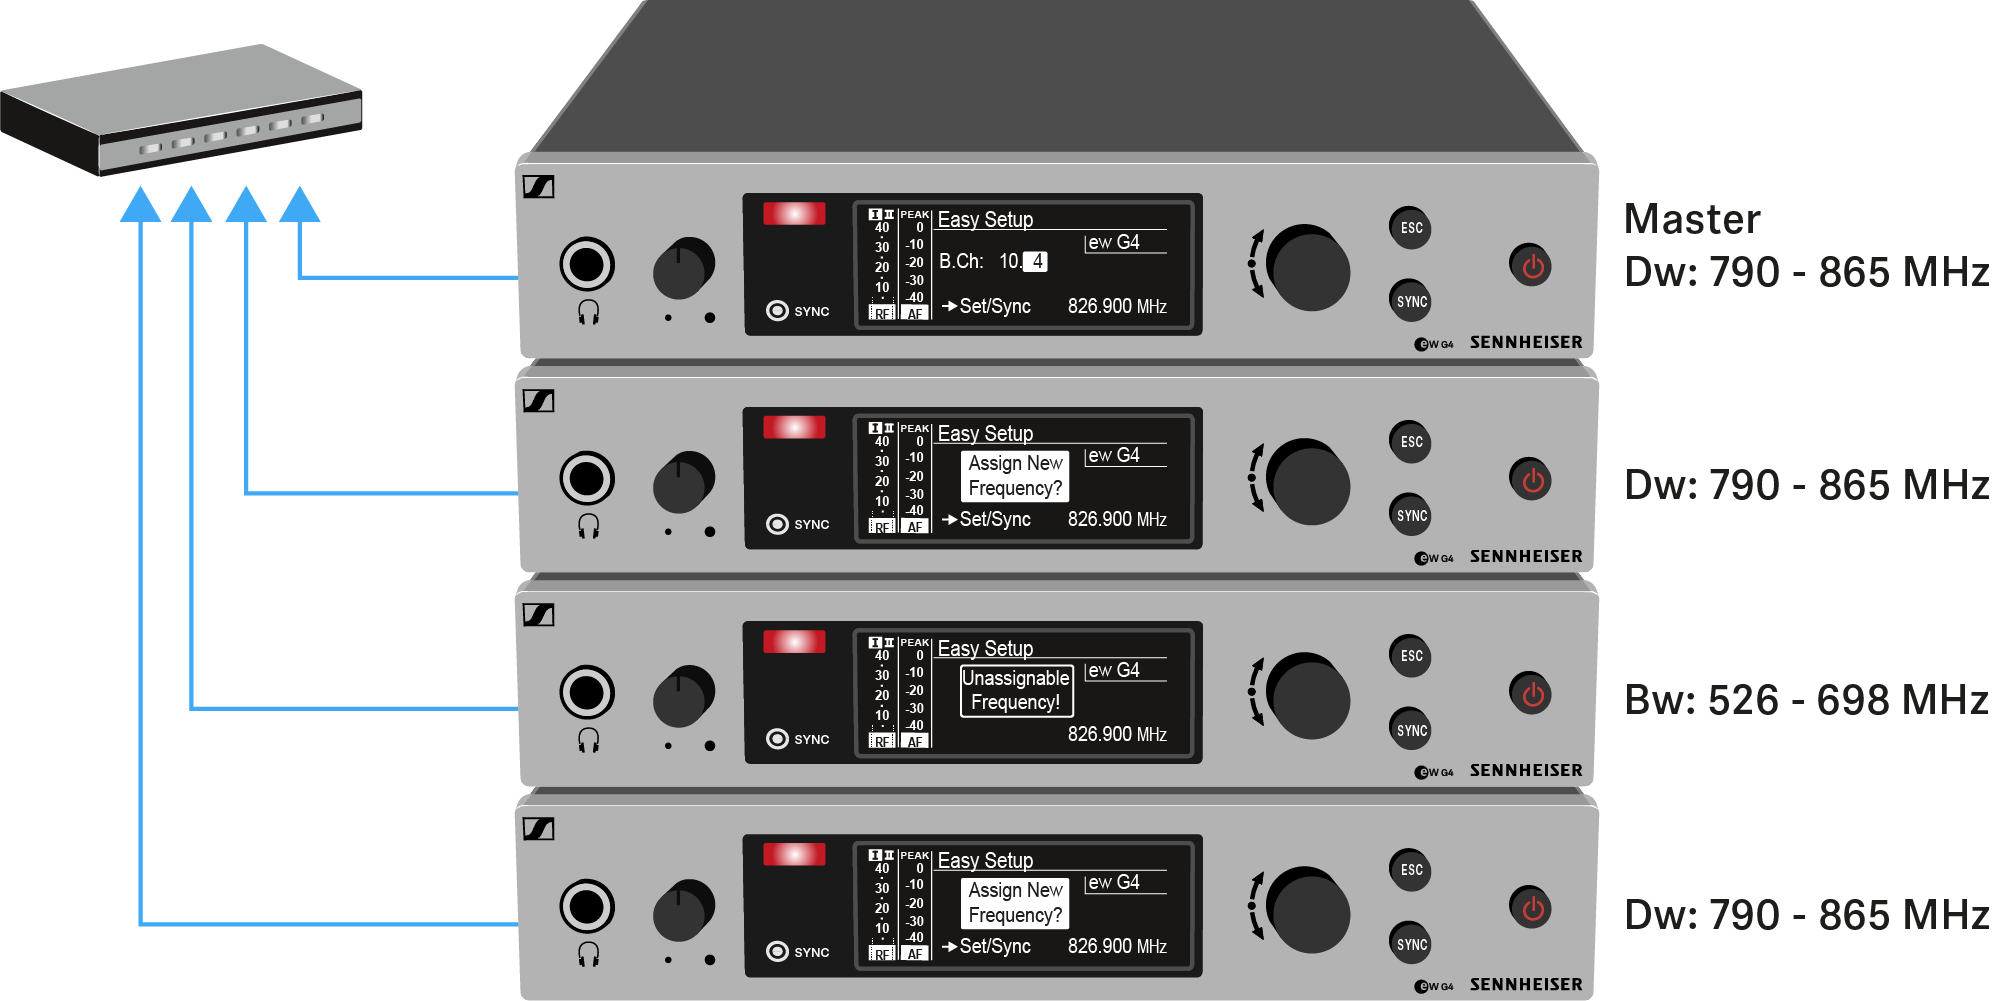
- Connect all of the receivers to one network using a network switch. See Creating a data network.
-
Please note that all receivers must be in the same IP address range.
- The IP addresses can be automatically assigned if there is a DHCP server in the network.
- If there is no DHCP server in the network, the IP addresses must be assigned manually. See Advanced -> IP Address menu item.
- Assign the IP addresses for all receivers in the 192.168.x.x range (the link-local range 169.254.x.x is also a possible alternative).
-
Open the Easy Setup menu item on one of the receivers.
This receiver is the master. You can choose any receiver to be the master.
- Perform the frequency scan on the master receiver as described under Scan New List.
-
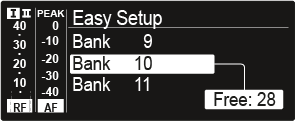
From the scan results in the master receiver, select a frequency bank with enough free channels.
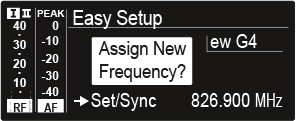
After you make your selection, the display panels of the other receivers will display the message Assign New Frequency?.Receivers with non-compatible frequency ranges will display the message Unassignable Frequency!.
-
Select an unused frequency for one of the connected receiver on the master receiver.
The frequency selected on the master receiver will also be shown on the display panel of the connected receivers.
-
Press the jog dial (SET) on the particular receiver to save your selected frequency and synchronize it with the corresponding transmitter at a later point (see Ew 300-500 G4 synchronizing).
OR
- Press the SYNC button to synchronize the selected frequency with the transmitter immediately.
- Use this procedure to assign an unused frequency to all connected receivers, one after another.
-
For the last step, assign a frequency to the master receiver.
This completes the multi-channel frequency setup.