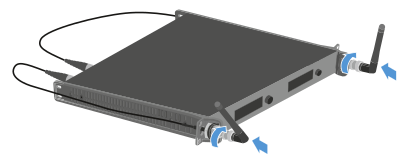
Installing receivers in a rack
You can install the receiver in any conventional 19" rack. The rack mounting angles are already attached to the device.
| NOTICE | |
|---|---|
Rack mounting poses risks!
When installing the device in a closed 19" rack or multi-rack assembly, please consider that, during operation, the ambient temperature, the mechanical load and the electrical potentials will be different from those of devices which are not mounted into a rack.
Make sure that the ambient temperature within the rack does not exceed the permissible temperature limit stated in the specifications. See Technical data.
Ensure sufficient ventilation; if necessary, provide additional ventilation.
Make sure that the mechanical load of the rack is even.
When connecting to the power supply system, observe the information indicated on the type plate. Avoid overloading the circuits. If necessary, provide overcurrent protection.
When mounting in a rack, please note that intrinsically harmless leakage currents of the individual power supply units may accumulate, thereby exceeding the permissible limit value. As a remedy, ground the rack via an additional ground connection.
| |
-
Support the receiver after the installation in the rack.
Due to the weight and depth of the device, there is a risk that it may break off in the rack and become damaged as a result.
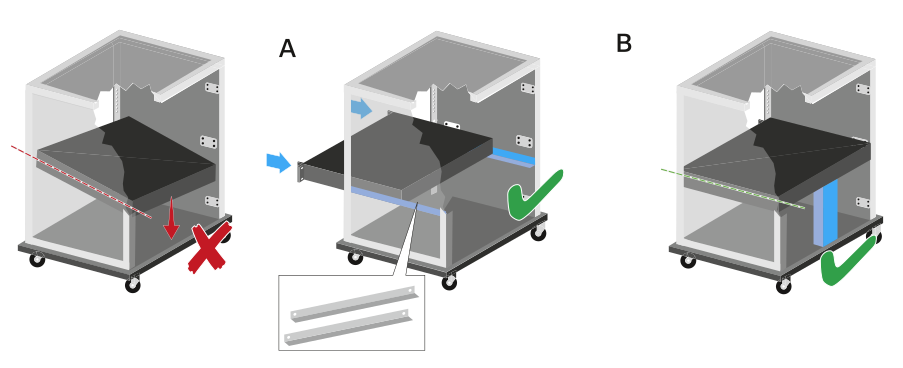
Version A
-
Use special rack mounting rails.
The design of the rack used must be suitable for the installation of these mounting rails.
Version B
- Use a suitable object to support the device on the rear side.
- Ensure that this object cannot become loose.
Using the optional Antenna Front Mount Kit
-
Disconnect the mounting brackets from the sides of the receiver.
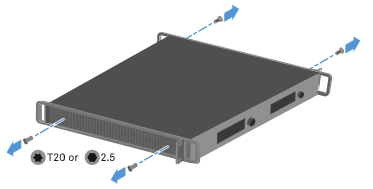
-
Attach the BNC connector holder to the RF patch cable as shown.
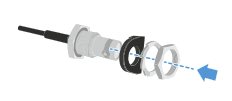
-
Attach the RF patch cable to the rack bracket.
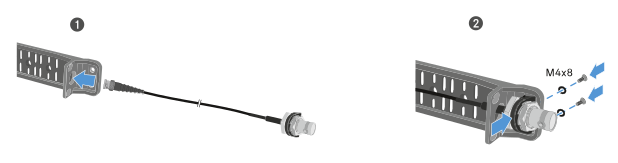
-
Attach the rack brackets and the RF patch cables to the receiver.
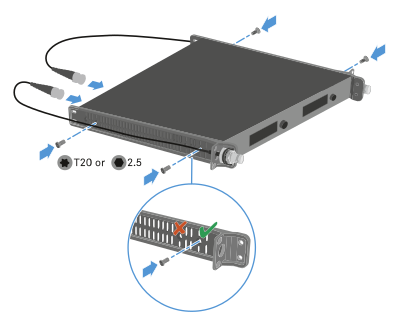
-
Attach the rod antennas to the RF patch cables.