Installing receivers in a rack
This chapter describes how to install a single receiver or two receivers side by side in a rack.
You can also set up the receiver without installing it in a fixed location. You can find more information about setting up the receiver under: Setting up the receiver.
| NOTICE | |
|---|---|
You need the GA 4 mounting kit to install the receiver in a rack, see GA 4 mounting kit.
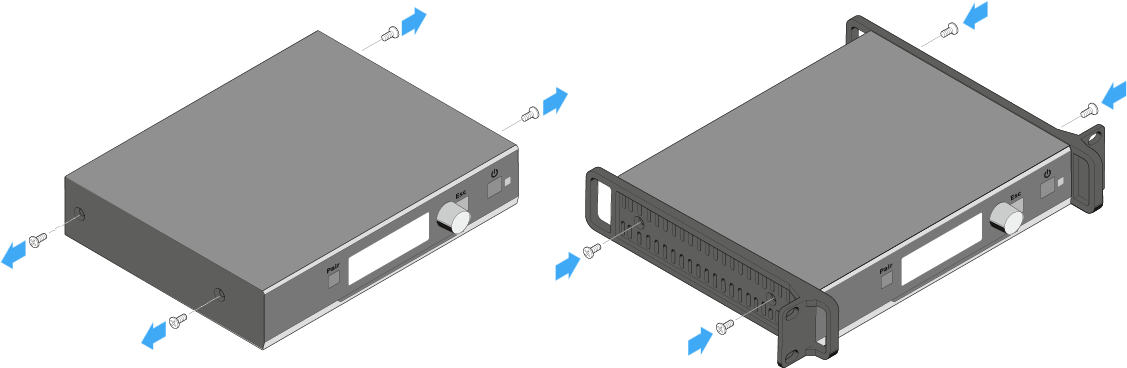
Fastening the mounting angles (to install a receiver)
-
Secure the mounting angles to the sides of the receiver using the previously removed recessed head screws.
Make sure that the angled ends of the mounting angles point forward.
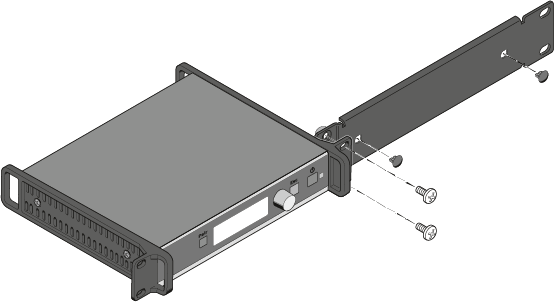
Installing the receiver in a rack
-
Use the two supplied recessed head screws to secure the blanking plate from the GA 4 mounting kit to the mounting angle of the receiver as shown.
Make sure to use the correct side (the one with the round holes) of the blanking plate to secure it to the mounting angle.
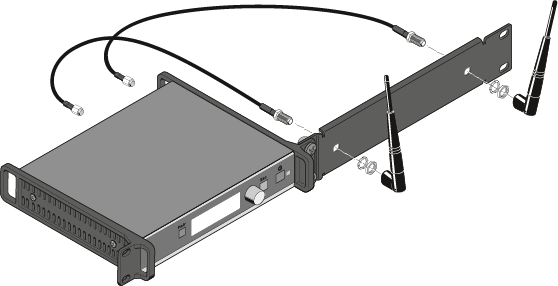
Mounting the rod antenna to the front of the rack
-
Pass the other ends of the antenna cables through the antenna holes in the blanking plate and screw them to the rod antenna as shown.
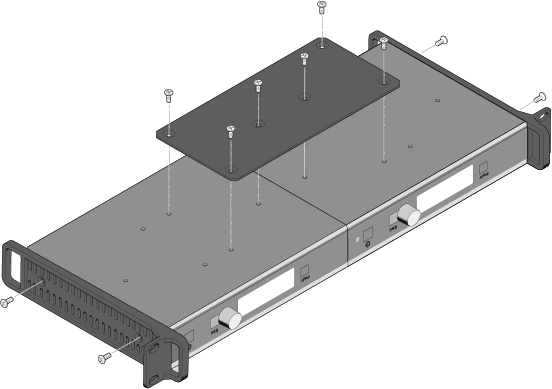
Mounting the jointing plate and fastening the mounting angles (to install two receivers side by side)
-
Secure the jointing plate to the receiver using the six recessed head screws as shown.
Connecting the AWM 2 / AWM 4 remote antenna to the receiver
Instead of the supplied rod antenna, you can also connect a remote antenna to the receiver. For more information, see AWM 2 / AWM 4 remote antennas.