
Installation
The MKE 600 offers a choice of phantom powering via the XLR connection or internal battery powering.
To use the microphone with phantom powering:
-
Connect the connector of the microphone cable to the video camera/camcorder
or recording device.
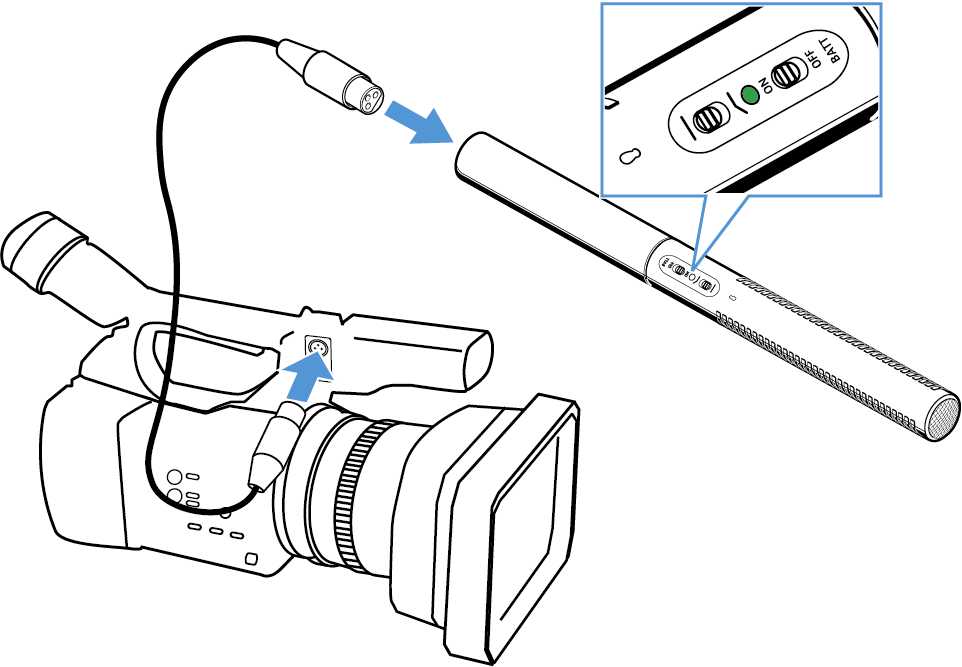
The LED is green: phantom powering is switched on; the microphone is operational.If phantom powered via the XLR connection, the microphone is continuously in operation (the BATT ON/OFF battery switch has no function).
To use the microphone with a battery:
-
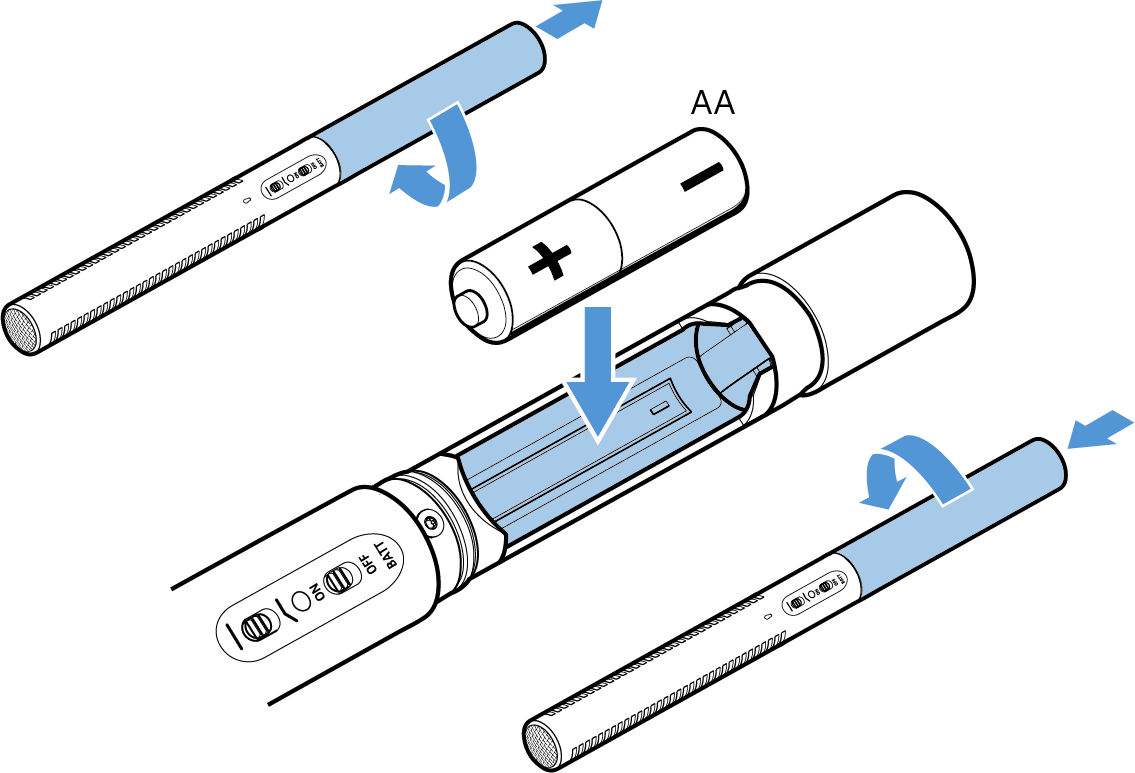
Screw the lower part of the microphone body back to the microphone by
turning it in the direction of the arrow.
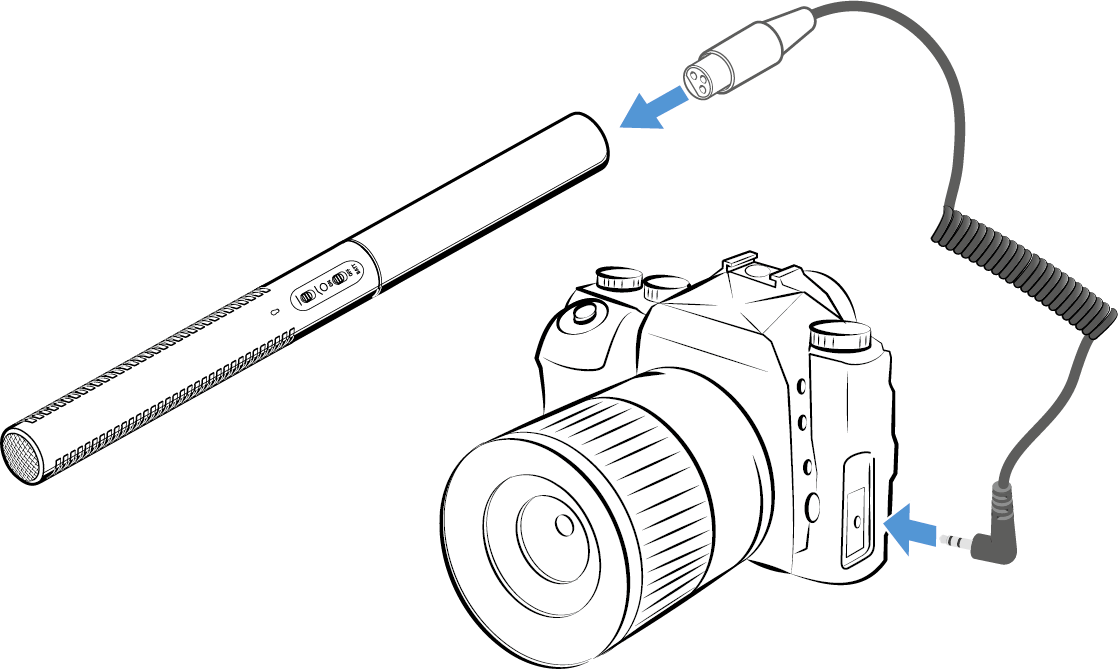
To use the microphone with a camera:
-
Connect the plug of the microphone cable to the camera.
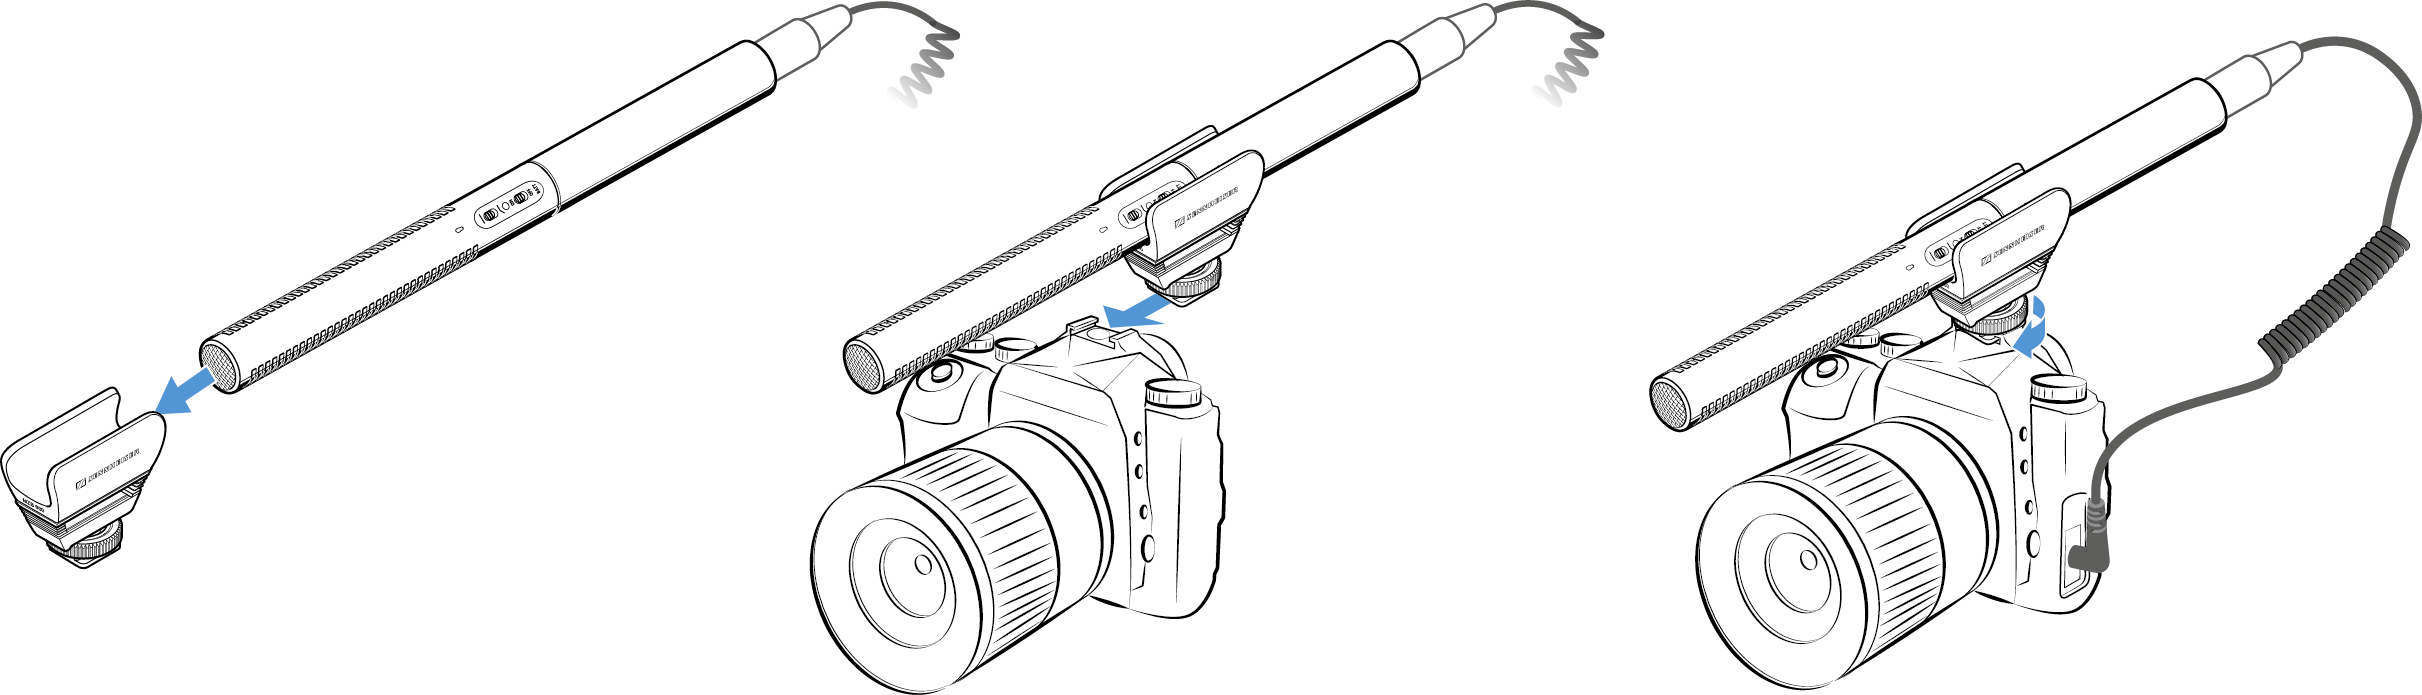
-
Tighten the stand clamp.
To use a windshield:
-
Slide the windshield over the microphone.
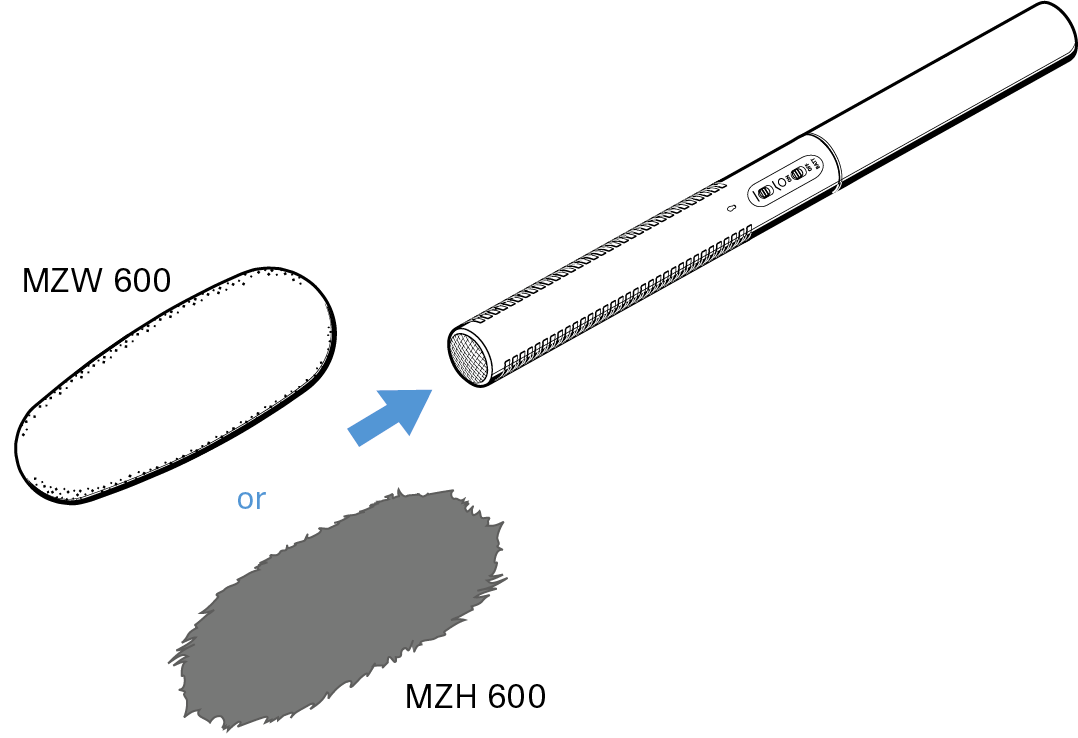
The MZW 600 foam windshield reduces wind noise by approx. 25 dB.