Displaying or adjusting the receiver‘s audio output level
To display and correctly adjust the receiver‘s output level:
-
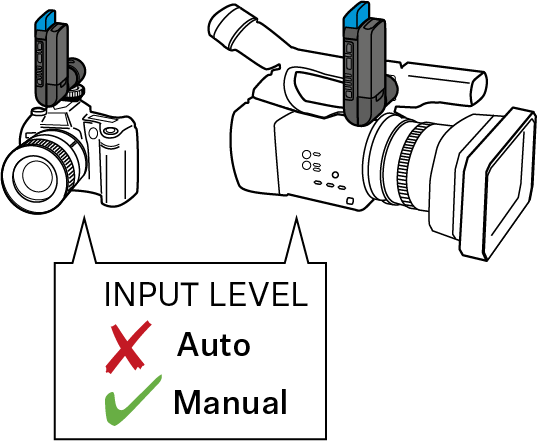
If your video or DSLR camera has an automatic level control, the automatic level control must be deactivated.
The receiver also has an automatic level control which cannot be deactivated. If both the automatic level control of the video camera and the automatic level control of the receiver are active, they will interfere with one another.
-
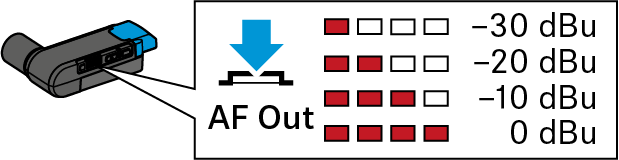
Short-press the AF Out button on the receiver.
The 4-step LED display indicates the current output level. This display automatically goes off after a while.
-
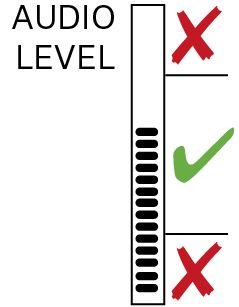
Check the output level display on the video or DSLR camera while using the microphone as usual.
The output level is adjusted correctly when the output level display shows full deflection only during the loudest passages. If your video or DSLR camera has a clipping display, this must never light up.
If the output level is adjusted to low or too high: