It is possible to operate the Spectera offering without dedicated router networks
e.g. in really small setups, but we do recommend to always use some kind of home network
router for trouble-free usage.
Especially for providing Internet access to Spectera Base Station it is possible to
use the builtin functionality of Windows and MacOS for Internet Connection
Sharing.
For enterprise networks we DO NOT RECOMMEND the usage of Internet Connection
Sharing. Most of the times it is even prohibited by enterprise IT policy to use such
service.
The network setup might look like this:
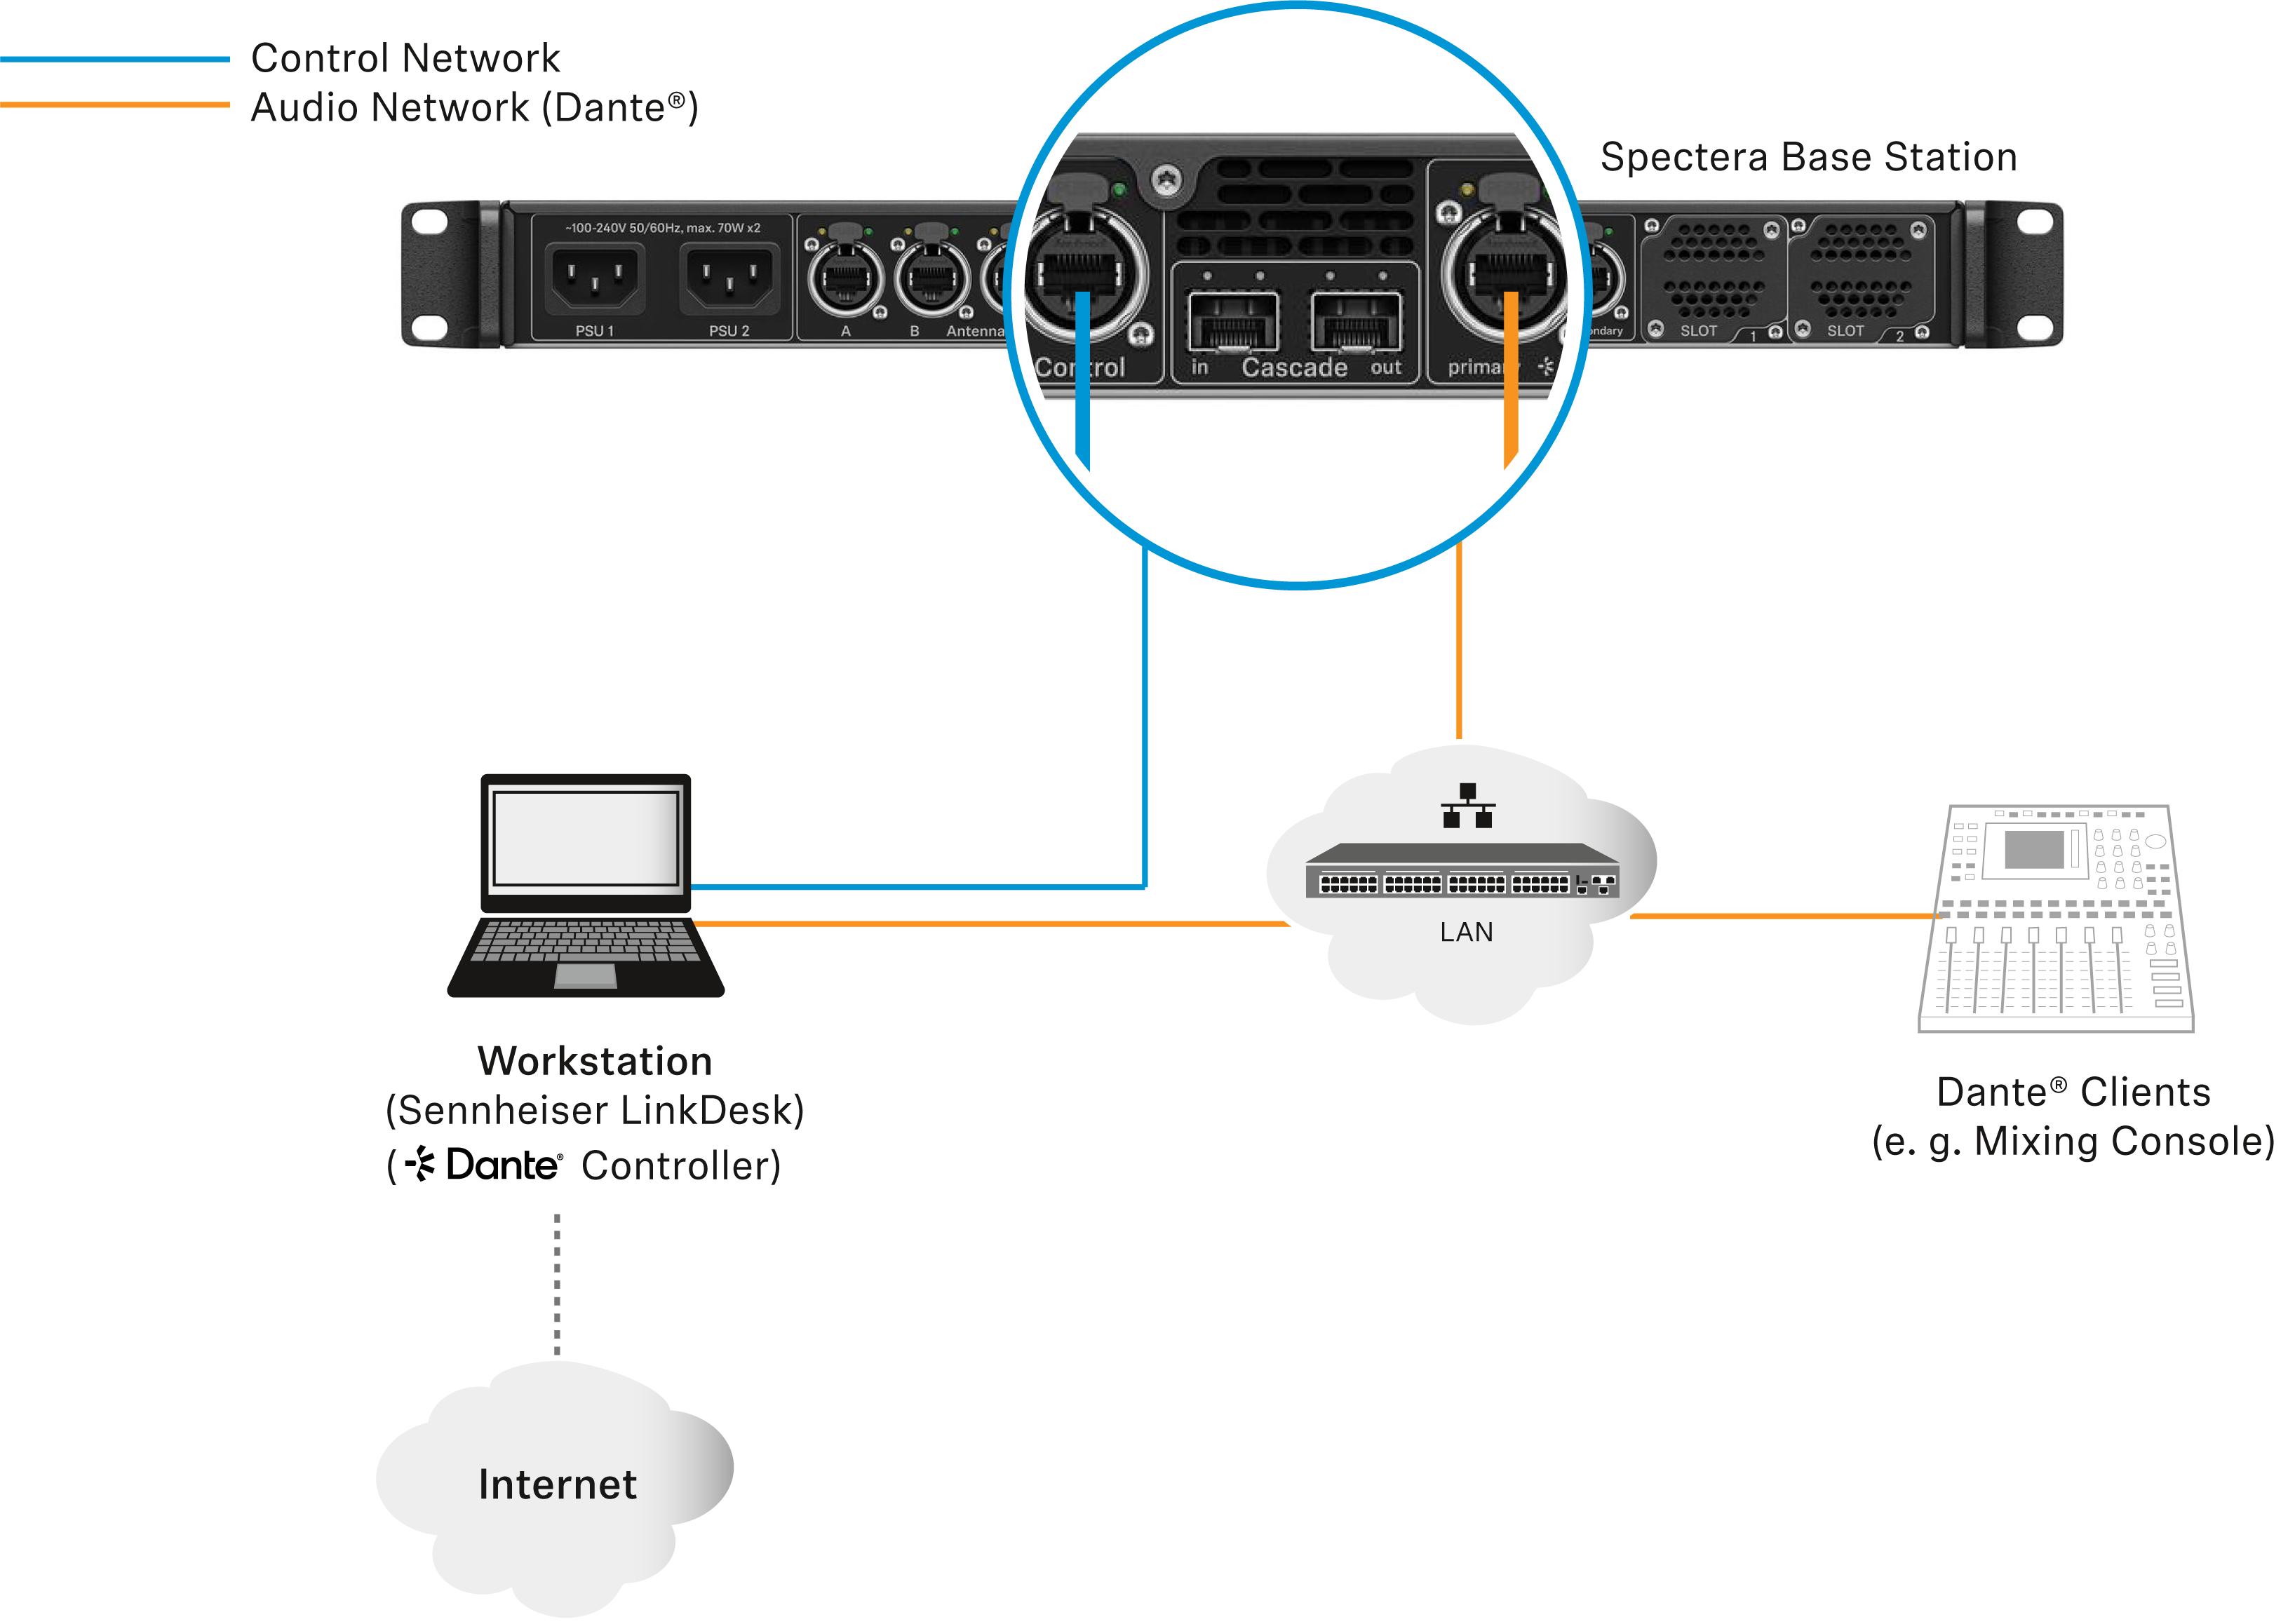
Inside this setup one workstation is used for all client software applications
(Sennheiser LinkDesk, Spectera WebUI, Dante® Controller). Either two separated wired
network interface are used for control and audio (Dante®) or one interface gets
shared. Please be aware that in such setups (typically) no DHCP service is
activated. Use either manual IP settings or ZeroConf configuration.
For Internet Connection Sharing typically an existing network connection (Wi-Fi or
Ethernet) with Internet access gets shared with another selected network interface
of the host.
In order to share your Internet connection on Windows:
-
Connect your client device to your host PC using an Ethernet cable. If either
device doesn’t have a free Ethernet port, use a USB-to-Ethernet adapter.
-
Go to the Network Connections menu. The easiest way to
get there is by searching for “Network Connections” in the Windows Search
box.
-
Right-click on the network adapter connected to the Internet (for example,
Wi-Fi or modem), and then select Properties.
-
Toggle Allow other network users to connect to
ON from the Sharing tab and select the relevant
Ethernet port from the pull-down menu.
Note that, if you have VPN software installed, you may see a lot of
virtual Ethernet ports on your list and you’ll need to pick the real
one.
After you click OK, Internet should flow to your client device over its
Ethernet port. For more details on sharing an Internet connection please refer
to the
Microsoft Support page.
In order to share your Internet connection on MacOS:
-
On your Mac, choose .
-
Click on General in the sidebar and then on
Sharing (you may need to scroll down).
-
Turn on Internet Sharing and click on
Configure.
-
Click the Share your connection from pop-up menu.
-
Choose the Internet connection you want to share ((For example, if you’re
connected to the Internet over Wi-Fi, choose Wi-Fi).
-
Under To devices using, turn on the port other devices can use to access the
shared internet connection. (For example, if you want to share your Internet
connection over Ethernet, select Ethernet).
If you’re sharing to devices using Wi-Fi, configure the Internet-sharing
network, then click OK.
- Click on Done.
For more details on sharing an Internet connection please refer to the
Apple Support page.
Your Internet connection will be shared on MacOS/Windows.