Starting up

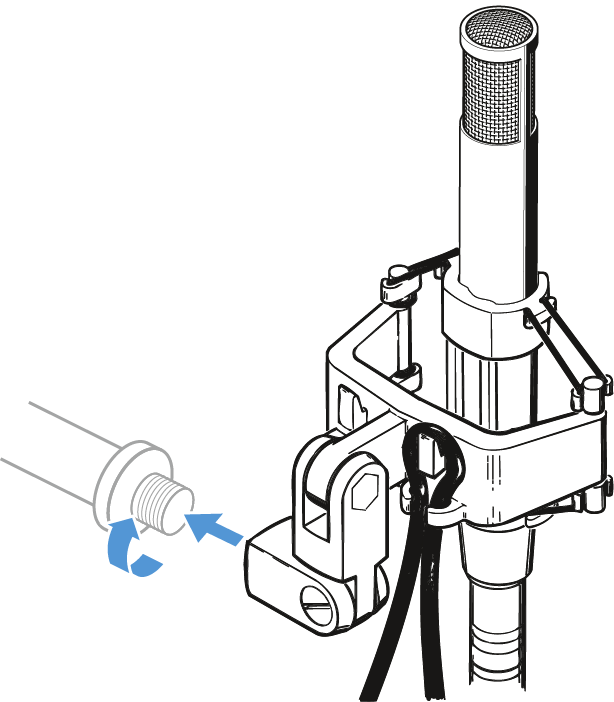
Mounting the microphone
The supplied MZS 80 shock mount allows the MKH 800 TWIN to be mounted to a stand and effectively protects against structure-borne noise.
  1. Select the suitable mounting thread:
    • Without thread insert: 5/8" thread
    • With thread insert: 3/8" thread
  2. Screw the shock mount to a stand.
  3. Pass the cable through the cable grip as shown.
  4. Place the microphone into the shock mount as shown.

Connecting the microphone
The MKH 800 TWIN has been designed for a 48 ± 4 V phantom powering.
  1. Connect the XLR-5 socket of the adaptor cable to the XLR-5 connector of the microphone.
  2. Connect the two XLR-3 connectors of the adaptor cable to the corresponding sockets of your mixing console.
  3. Switch on the phantom powering on your mixing console.

    The LEDs Front and Rear on the microphone light up.
Aligning the microphone
  1. The front of the microphone is marked by the word “Front” and a blue LED whereas the rear is marked by a red LED.
  2. The LEDs can be used for aligning the microphone. On-axis alignment is indicated by maximum brightness.
Function monitoring
  1. The two LEDs Front and Rear indicate operational readiness separately for both channels. The LEDs go off if the supply voltage drops below 42 V.
Using the windshield
Pop noises resulting from close miking can be suppressed effectively using the optional MZW 80-ANT windshield.
  1. Slide on the windshield onto the sound inlet basket.